Today we’ll address an important question that pops up quite often – How do you turn your Instagram profile into a creator profile or business account?
While the process is rather simple, people often times get confused, and even more so when they want to link their Facebook page to it. Don’t worry, we’ve got you covered and in this article we’ll go through the process step by step.
To learn why you should use insights, read our guide on using Instagram analytics in 2020.
Why Switch To A Business or Creator Profile?
Business and creator profiles have access to Instagram Insights and that is one of the most valuable tools you can have at your disposal as an up-and-coming business or influencer, and if you want to use sharemyinsights - you'll need to switch. If you want to read more about Instagram Insights, check out our article on the subject.
The second reason you’ll want a business or creator profile is if you want to run ads.
Luckily for you, switching account types is fairly simple and straightforward, so let’s see how it’s done.
Step-By-Step Guide To Switching Your Account Type
Please note that you must do this through the mobile app, it's not available on desktop.
1. Tap the hamburger menu on your profile page
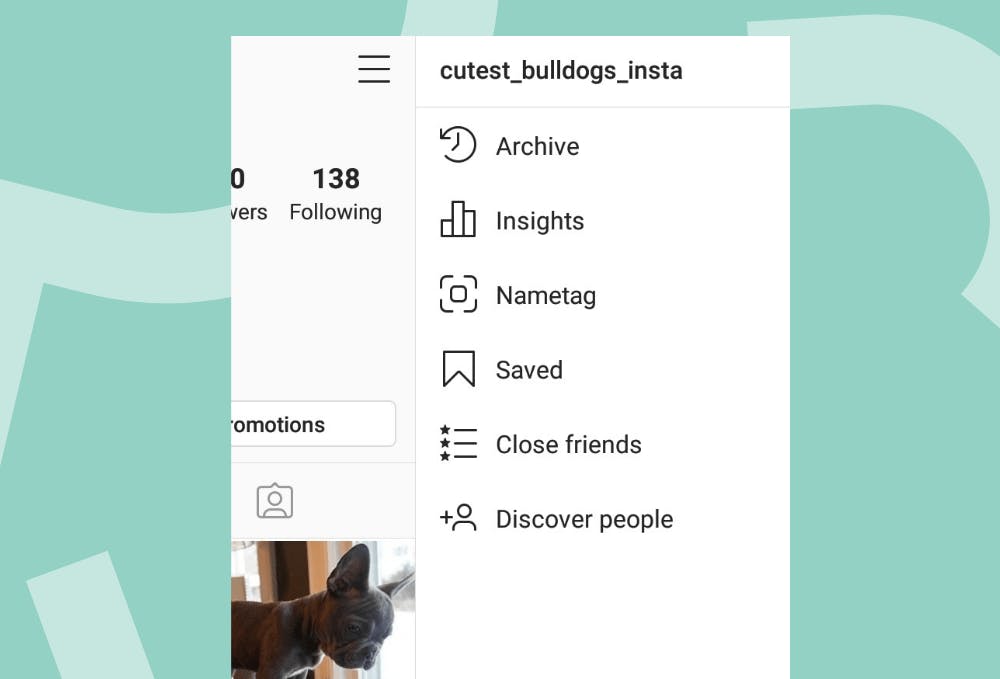
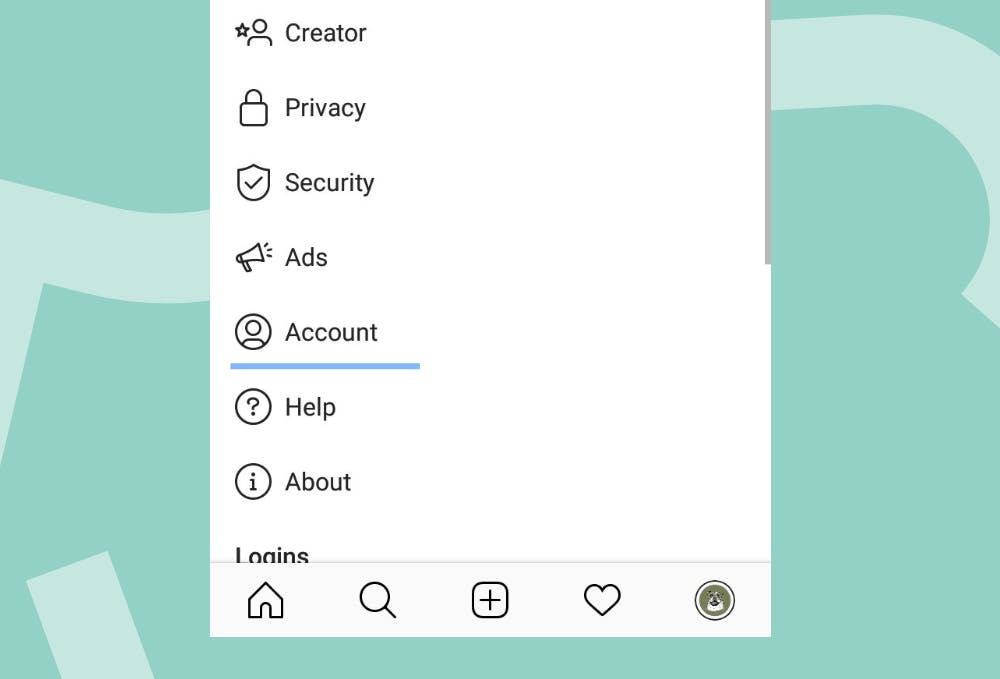
2. Go to settings and select "Account"
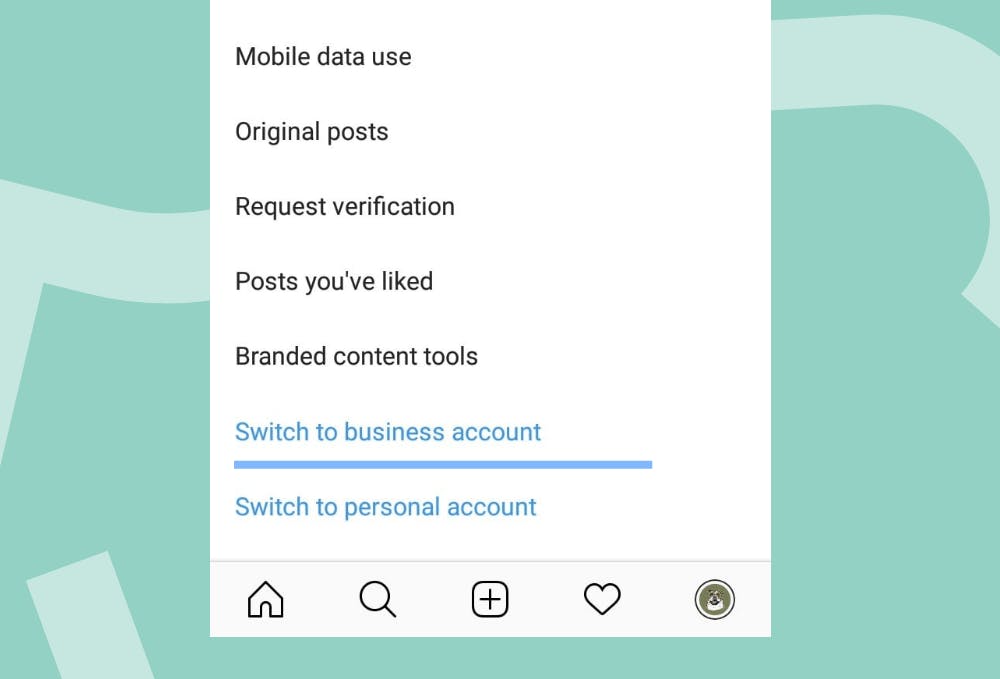
3. Select "Switch to business account"
4. Connect to a Facebook page
If you choose a business account in this step you will have the option to connect it to a facebook page (if you already have one) otherwise you will need to create one.
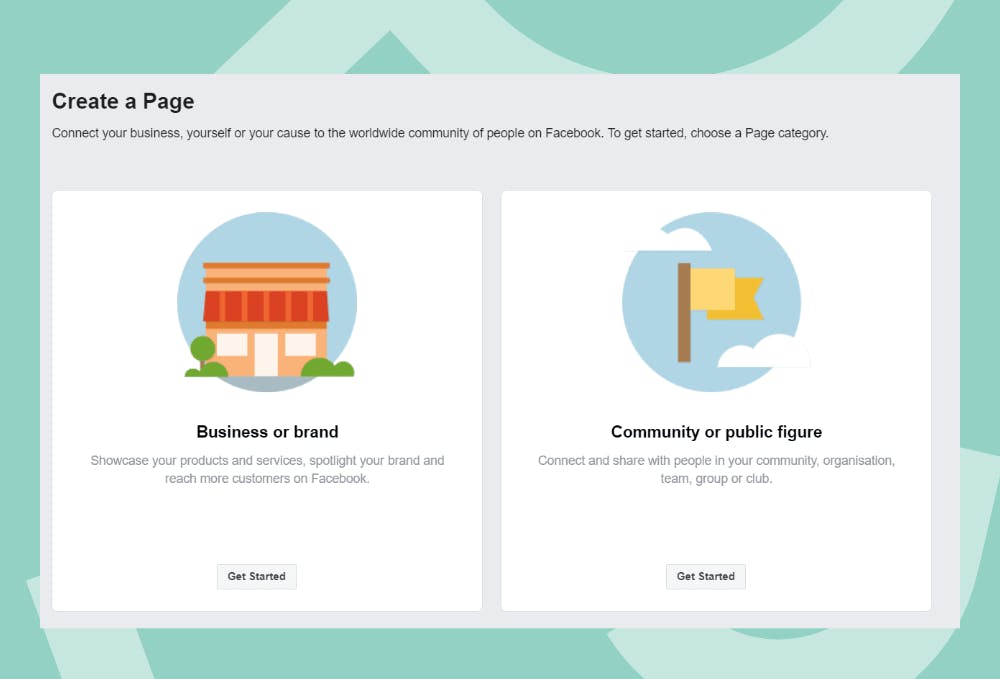
5. Follow the prompts to finish switching your account type
The process is easily reversable, so don’t worry about it. You can change between business, creator and personal profile without any hassle.
Step-By-Step Guide To Creating A Facebook Page
After you switched over to a business or creator profile, you might want to create a Facebook page and link it to your account, so you can get full functionality. This is what will allow you to run paid ads on both Instagram and Facebook.
- Visit https://www.facebook.com/pages/creation/
- Choose a page type
- Follow the instructions and fill out the necessary information
Step-By-Step Guide To Linking A Facebook Page
Before we start, it’s important to note that Instagram will automatically link the Facebook account that is logged into your Facebook phone app. If you don’t want that account linked, but rather some other, you should log out now, and only then follow the instructions.
- Once again, go to the Account page talked about in Step 3 of switching the account type
- This time, select Linked Accounts and link your Facebook account
- Now your Facebook and Instagram profiles are linked together, but we’re not done yet
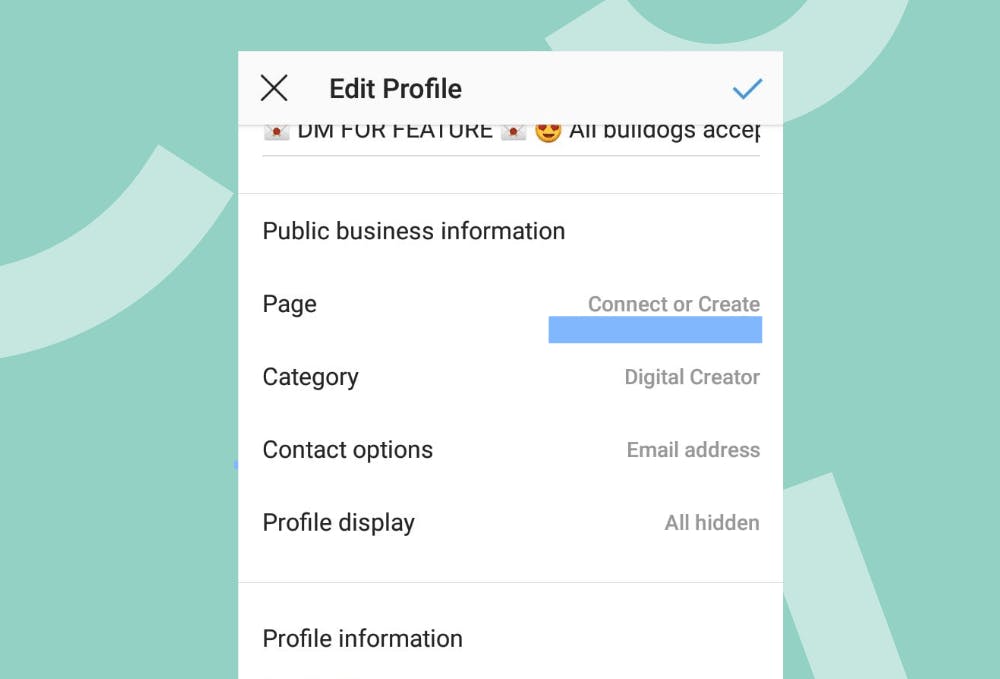
- Go to Edit Profile from your profile page
- Under Public business information you’ll see Page and the option to Connect or Create (highlighted in the picture)
Link your page and you’re all done!
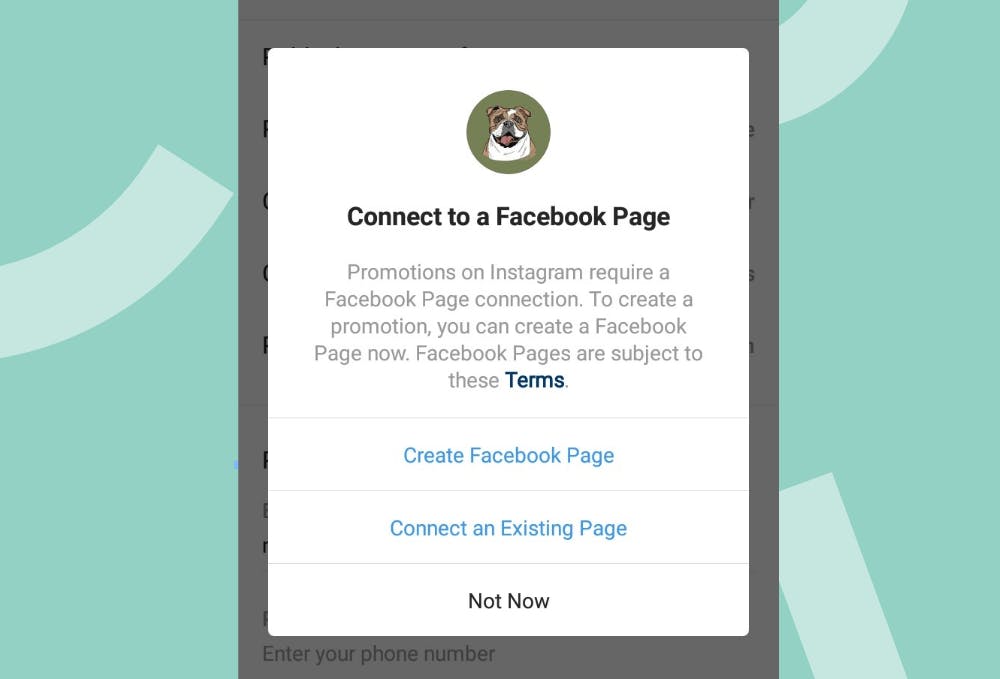
Note that, in order to link a Facebook page you need to have admin privileges, but if you just created the page, you have them by default.
Now you can use Instagram Insights, start some paid ads and add contact details to your Instagram account!
There you have it. Now you know how to get a business or creator profile, create a Facebook page and link it to your newly-switched Instagram profile. The process is fairly straightforward if you follow our easy step-by-step guide!
