Instagram scheduling is a game-changer for marketers. Since I started scheduling Instagram posts in advance, I’ve saved a lot more time and that's great because I can spend that time growing my business.
Over the last 3 years, I’ve tried (almost) every popular social media scheduling tool out there and there are some that were a waste of time, very expensive or too complicated to use.
In this post, I’ll share my process of scheduling Instagram posts with Pallyy to help you save time.
How to schedule your Instagram posts
Step #1: Start with a list of topics
Do a little research to find out:
- What topics are trending in your industry
- What questions do your followers need answers to
- What are your competitors talking about
Then write down your ideas for Instagram posts.
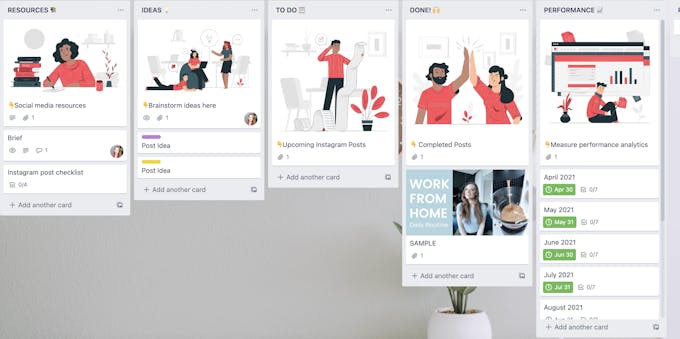
I like to use Trello to plan Instagram posts, but you can use any other calendar tool or even write it down in a good-ol paper planner.
Here's the Top 5 Websites to find content ideas
Step #2: Create, curate and save posts in your media library
Whether you create original content or repost user-generated content (UGC) planning ahead of time and batching is key to staying productive.
Here are some tips on batching and creating content:
- Plan product or team photoshoots ahead of time
- Edit photos and videos in batches to maintain consistency
- Supplement photos with branded graphics and quotes
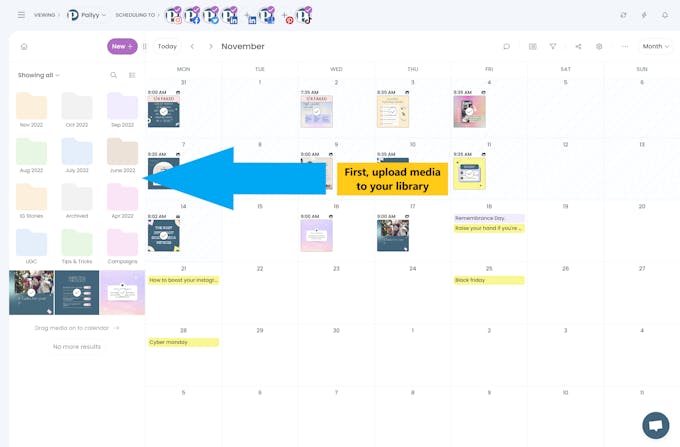
To help you repost UGC easily, Pallyy added a new feature called “Explore”. With this feature you can search content based on a hashtag or account name.
You can also find posts that people have tagged you in and repost them. Don’t worry: Pallyy helps you give proper credit by tagging the original account in the caption.
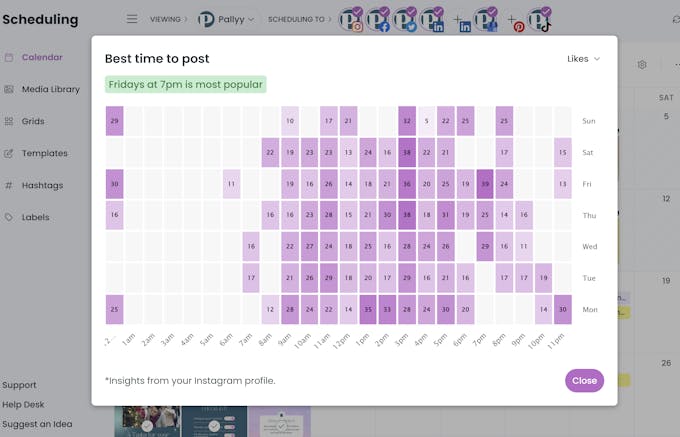
Step #3: Find your best times to post ⏰
One of the best parts of scheduling posts is that you can choose the time of posting. Why is this important? The Instagram algorithm ranks posts based on the interactions they get in the first few hours of publishing.
Ideally, you want to schedule posts at your audience’s peak activity time. This will generate more likes, comments and shares and your posts can reach more people.
Find out your best time to post for likes, comments and reach using our built in Instagram analytics tools.
Step #4: Create a beautiful grid and preview it
First impressions matter on Instagram. A beautiful feed helps you capture new visitors' attention and convinces them to follow your account.
With the drag and drop feature, you can easily swap posts and arrange them in visually appealing patterns. You can also preview your feed before scheduling your posts.
Step #5: Save captions & hashtags templates for faster scheduling
Now that you have imported and arranged your images, it’s time to complete your posts with captions, hashtags, location and tags.
If you’re sharing repetitive content like blog posts or promotions, you can create caption templates and save them for future use with Pallyy's built in tools. Just create your pre-set list and insert it when creating your post.
Do the same thing for hashtags.
Find out your top hashtags, export them and save them to increase your efficiency. I have a general list of hashtags I use for most of my posts, and a separate list for when I share motivational quotes.
Step #6: Publish, save as draft or schedule posts
Select the platforms you want to schedule your posts on from the top menu of social icons. If you only want to schedule your post for Instagram, make sure you deselect the other options.
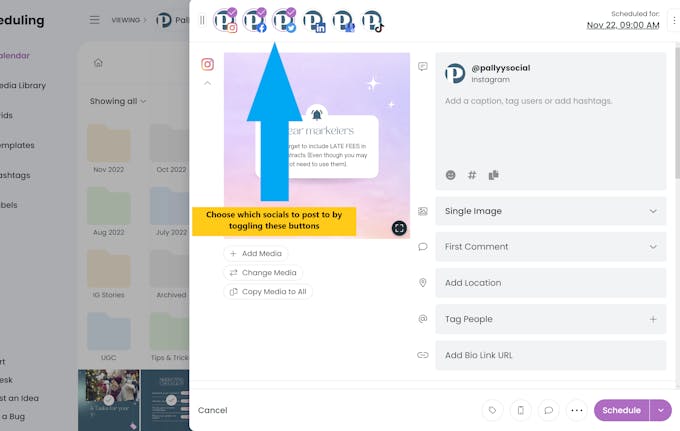
After you've completed all the info about your post, you can schedule it for auto-posting. Select a date and time your followers are most active and click Schedule.
That's all! Your post will go live at your selected time.
Alternatively, you can save your post as a draft and come back later to publish it.
